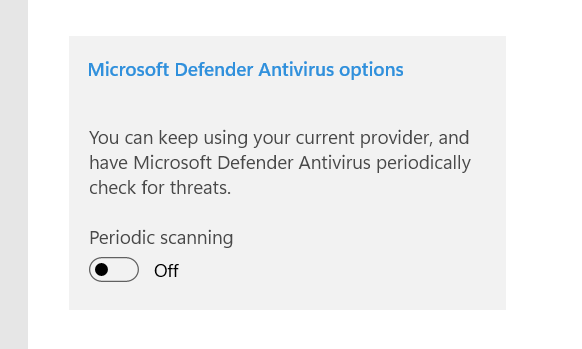
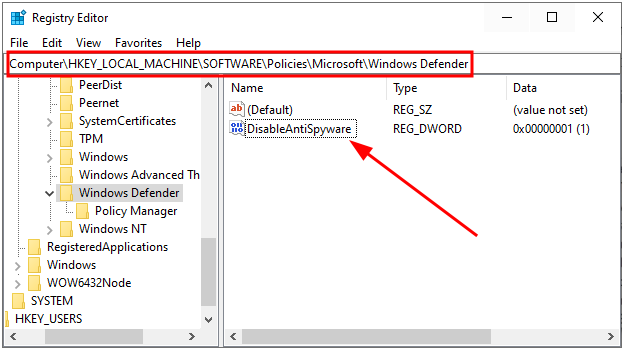
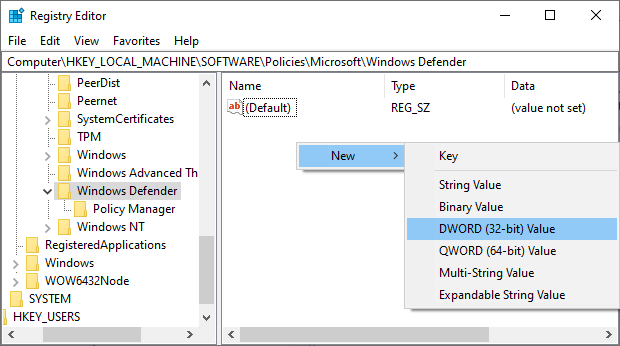
Microsoft Defender (aka Windows Defender) is one of the good guys that protect your PC in the absence of a 3rd-party antivirus program. This is free and native malware protection, ensuring a Windows PC remains always protected. Straightaway, the easiest solution is to switch to a reputed antivirus program that stops Microsoft Defender from creating this nuisance. However, Microsoft Defender may still run alongside any external antivirus program. In that case, it’s best to safely turn off the Periodic scanning under Windows Security > Virus & threat protection > Microsoft Defender Antivirus options. Besides, you need to create or edit a registry value to avoid extensive resource consumption. First, open Windows Run by pressing the Windows key + R. Next, type regedit, press OK to enter Registry Editor, and navigate to Computer\HKEY_LOCAL_MACHINE\SOFTWARE\Policies\Microsoft\Windows Defender. Look for the DisableAntiSpyware key, double-click, and change the Value data to 1. You can also create this key if it isn’t there. For this, right-click in the empty space, enter New and select DWORD (32-bit) Value. Finally, name the value as DisableAntiSpyware and change the value to 1 as indicated previously. So, that is the simplest fix. But still, if you’re about to stick to the in-built antivirus protection, here are some remedies to follow.
Fix Antimalware Service Executable
Many factors trigger this Service (MsMpEng.exe), and users have reported a few solutions that fixed it for them. Let’s check each one to see which works for you.
Regulate Scheduled Scans
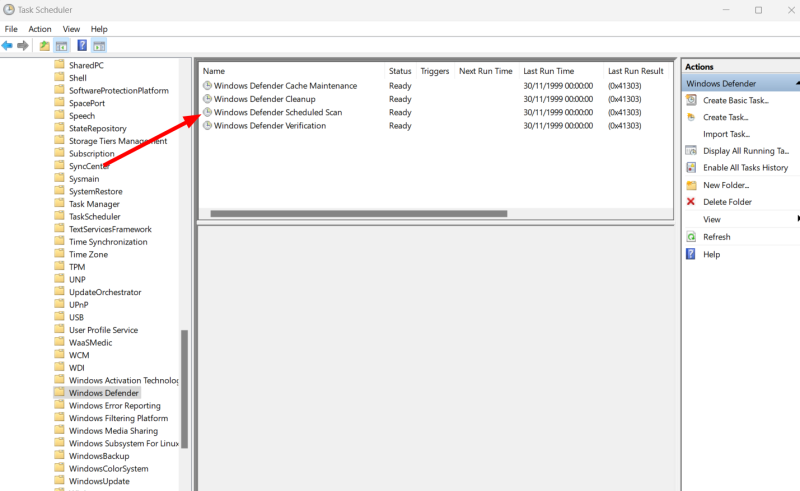
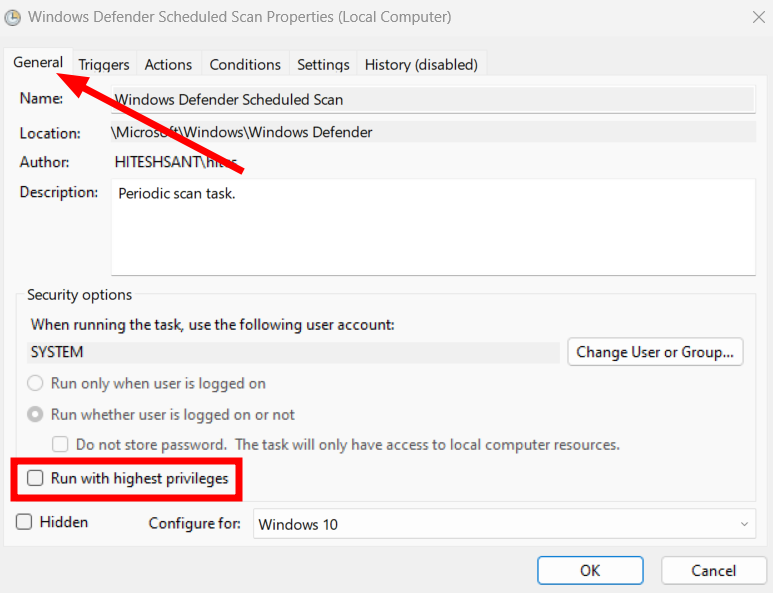
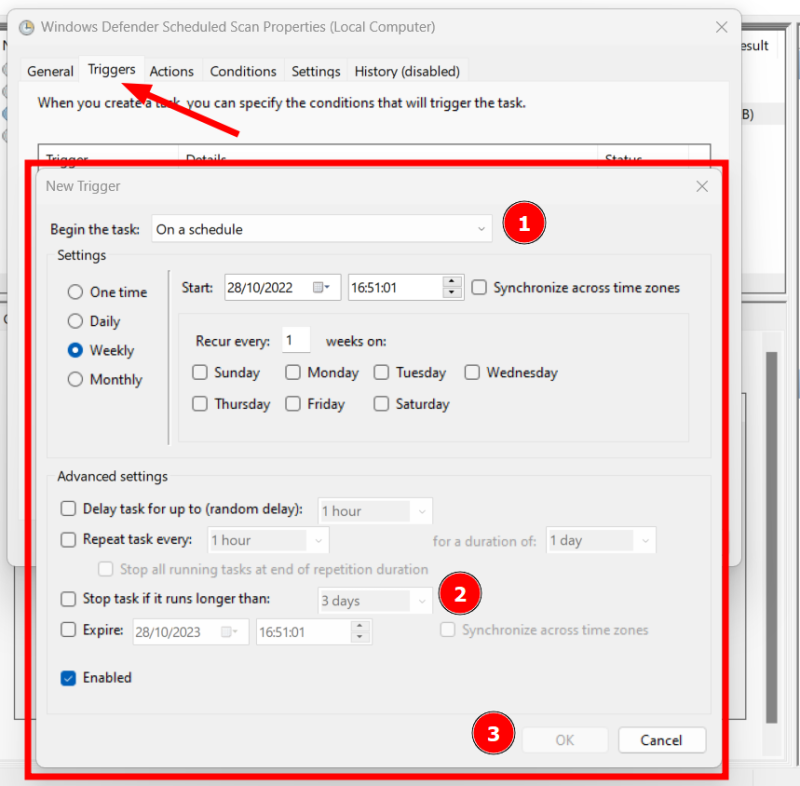
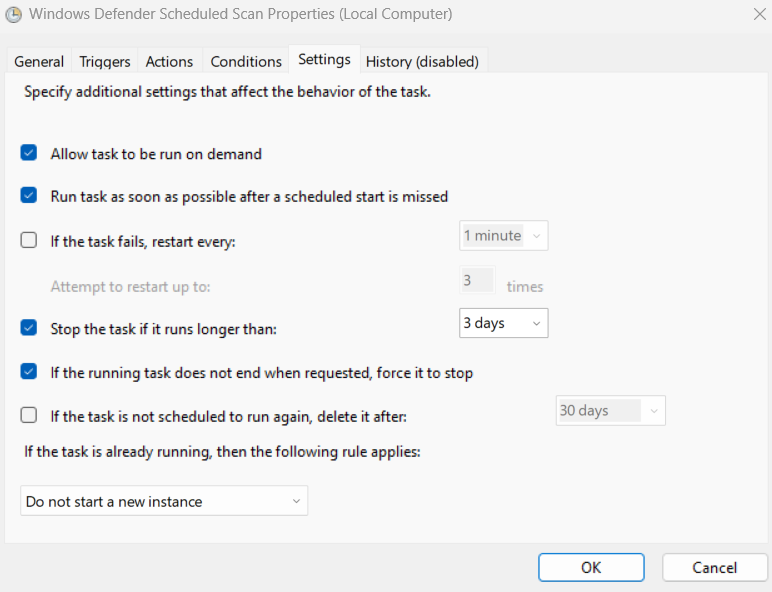
Microsoft Defender runs periodic scans to maintain the system’s health. You can check that from Task Scheduler and manage the scan priorities. First, open the Windows Run by pressing ⊞+R and type taskschd.msc. Alternatively, you can use the taskbar search for opening Task Scheduler. Next, navigate to Task Scheduler Library > Microsoft > Windows > Windows Defender, and double-click Windows Defender Scheduled Scan. Under the General tab, make sure the Run with highest privileges is unchecked or uncheck it and press OK at the bottom. Though you can turn it off entirely, it defeats the purpose of having malware protection. So instead, we will schedule it to our convenience so that it doesn’t bogs down your PC on a busy workday. These settings sit under Trigger, beside the General tab we have just seen. There are many things to tweak. Importantly, you can begin this process on a set schedule and terminate if it takes longer than a set duration, followed by pressing OK. Similarly, you can indicate a few situations under the Conditions tab, which further restricts when the scheduled scan runs. Finally, the Settings menu has some options to control it further. However, a few settings, like the task duration, are repeated. The best option here is to set it similarly to the trigger. Please remember to press OK after each step or combinely afterward for the configurations to take effect.
Set Process Priority
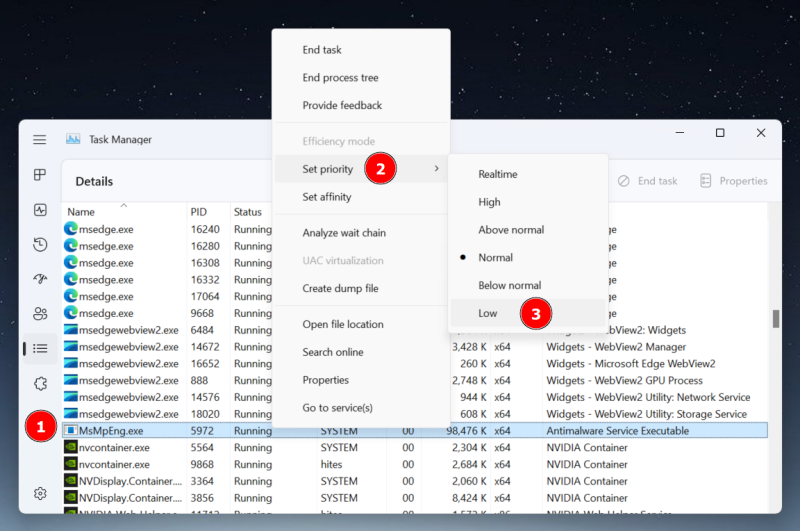
The above steps were about scheduling the scans. Still, when it occurs, it may consume most resources, rendering the system unusable. In such cases, tweaking the specific process priority can help. Since this process executes MsMpEng.exe, a quick fix can be setting it to a low priority to avoid resource overconsumption. For this, open the Task Manager to find Antimalware Service Executable under the list of Processes. Then right-click the subject process and click Go to details. This will take you to the related application, MsMpEng.exe, in this case. Finally, right-click again to head into the Set priority, and select Low. The only (and a major) problem with this solution is the priority values reset after the first scan or a system reboot. And though there are a few 3rd party applications to set permanent priorities, I couldn’t find them reliable enough to recommend. The best of the lot, Bill2’s Process Manager, was last updated in 2014 and doesn’t allow setting priority of MsMpEng.exe even in the administrator mode. Eventually, you’re left with setting this from the task manager each time it eats more resources than desired.
Adding MsMpEng.exe exclusion
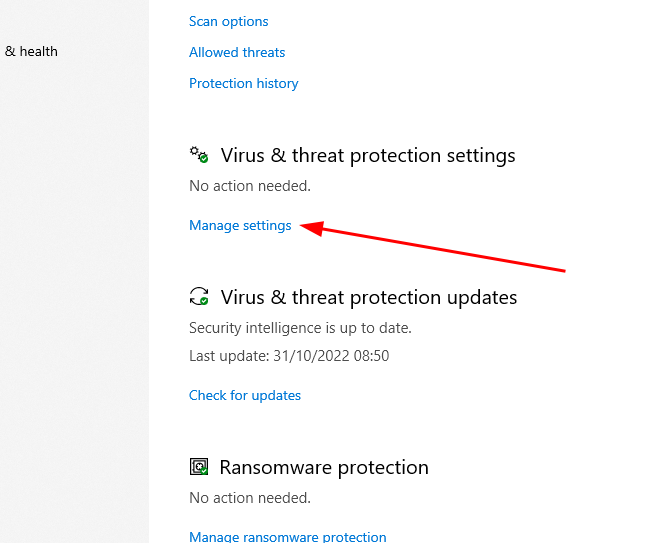
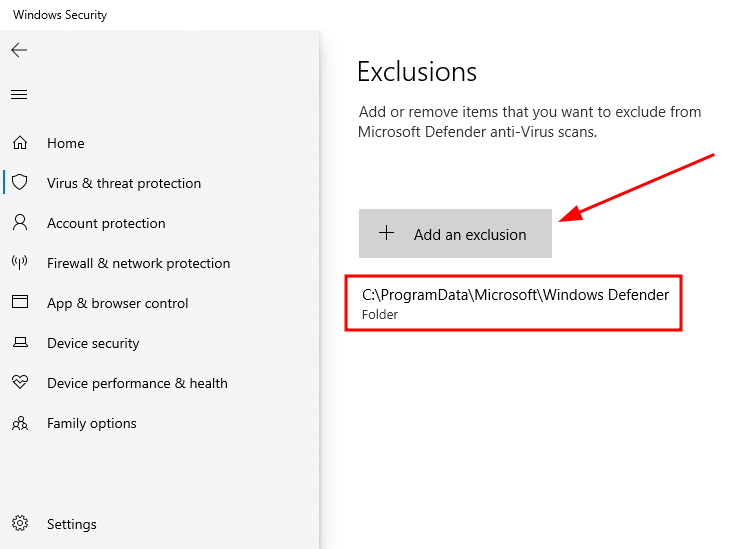
A strange fix reported by many Windows PC users is by refraining Windows defender from scanning its own folder or the responsible Antimalware Service Executable process, MsMpEng.exe. The option to add exclusion sits under Windows Security > Virus & threat protection. Scroll down to Exclusions, click Add or remove exclusions, and select +Add an exclusion. Subsequently, select Folder from the drop-down. Finally, navigate to the Windows Defender folder which is usually located at C:\ProgramData\Microsoft\Windows Defender. This will add all the associated files, including the MsMpEng.exe. Alternatively, you can also select Process with the Add an exclusion pop-over and type MsMpEng.exe to add this individual program.
Turn off Automatic Sampling
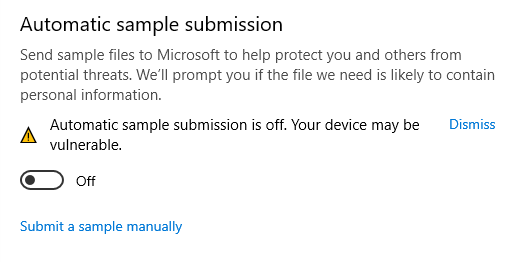
This is another user-reported solution that, however, creates a sub-optimal security environment. Regardless, you can do this by toggling off Automatic sample submission under Virus & threat protection settings. Still, some went further by disabling real-time protection in Virus and threat protection settings we strongly suggest against. It’s almost equivalent to having no antivirus at all. And if you still can’t sort it out and don’t want to opt for a paid solution either, there are some free antivirus programs you can try.
Wrapping Up
Windows Defender is the usual culprit behind Antimalware Service Executable eating away a significant amount of CPU and RAM. A quick fix, as already stated, is to ditch Microsoft Defender for some premium security solution and make registry adjustments to ease these concerns. However, one can also schedule the scans, add exclusions, and tweak some security settings to avoid excess resource consumption. Finally, run a full antivirus scan to root out any malware. Still, let’s check some Windows problem-solver tools to take care of some similar problems for you automatically.
